...
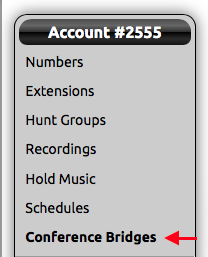
- Login to the NocTel control panel and click Conference Bridge in the left-hand menu.
- The Conference Bridges page will list any bridges that have been previously created in the account. Click the "Add a Conference Bridges” link above the list to create a new bridge and open the Conference Bridge Editor.

- Within the Edit Conference Bridge page the following information should be entered:
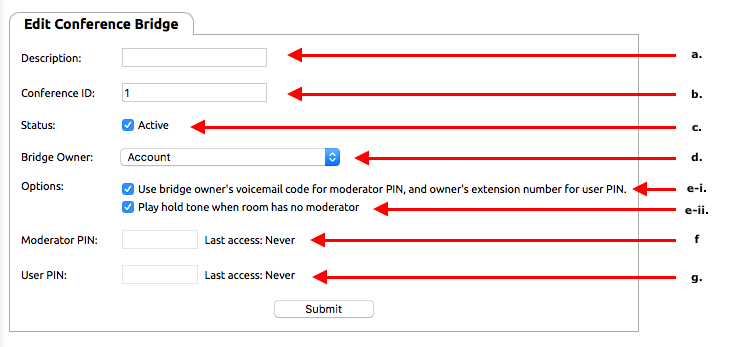
- Description: Enter a meaningful description/name of the bridge.
- Conference ID: The ID is a distinct number that directs the user to the correct bridge when they arrive at the conference center. If no conference bridges are in the account, the Conference ID will automatically start numbering at 1. Otherwise, the numbering will start with the next number in sequence from the last made bridge.
NocTel recommends using a conference bridge numbering scheme, developed by your account administrator, and used in conjuncture with routing options in the Account Preferences (this is covered later in the article). This ensures that conference ID will not overlap with other extensions, and to allow for the controlling extension to connect the user to the correct bridge by only dialing the ID.
NOTE: while the numbering scheme for the Conference ID does not have to match the account extension length it is recommended that they do. 911, 999 and 611 should be avoided as IDs. - Active: This check box allows for the conference bridge to be made active, making the bridge accessible to users. Bridges with this box unchecked, are inactive and cannot be accessed by users.
- Bridge Owner: By default, the extension belongs to the account. The bridge must be assigned an owner other the account, use the drop-down box to select a extension. Assigning the bridge to an extension combined with the first option allows for the bridge to use the extensions number for the User PIN and the extensions voicemail PIN as the Moderator PIN, if desired.
- Options: Under options are checkboxes that can be used to adjust features of the bridge:
- “Use bridge owner’s voicemail code for moderator PIN, and owner’s extension number for user PIN”: this is used in conjunction with the Bridge Owner option to use data from the extension which is selected as the moderator and user PINs. The selected extension’s number becomes the User PIN, while the selected extension’s voicemail PIN becomes the moderator PIN.
NOTE: When this box is checked, data in the Moderator PIN and User PIN is removed, and no additional data can be added. If a PIN was entered before the box is check, unchecking will return the previous PIN if done before click submit. Once submit is clicked the previous PINs are overwritten. - “Play hold tone when room has no moderator”: this allows for a hold tone to be played to anyone joining as a user when there is no moderator present in the call. Only when a moderator joins does the call become active.
- “Use bridge owner’s voicemail code for moderator PIN, and owner’s extension number for user PIN”: this is used in conjunction with the Bridge Owner option to use data from the extension which is selected as the moderator and user PINs. The selected extension’s number becomes the User PIN, while the selected extension’s voicemail PIN becomes the moderator PIN.
- Moderator PIN: if the Bridge Owner data is not being used, the bridge can be assigned a moderator PIN. This is the code the moderator will use to access the bridge with moderator rights. It is recommended that the PIN is at least 4 digits. The Last access data will change once the bridge is used. It will show the last time the PIN was used.
- User PIN: if the Bridge Owner data is not being used the bridge can be assigned a user PIN. This is the code that normal user will need to gain access to the bridge. It is recommended that the PIN is at least 4 digits.
- Click Submit to save.
...
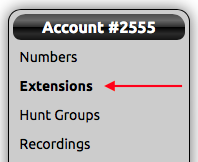
- Login to the NocTel control panel and click Extensions in the left-hand menu.
- Above the list of existing extension, click the “Add a New Extension” link.

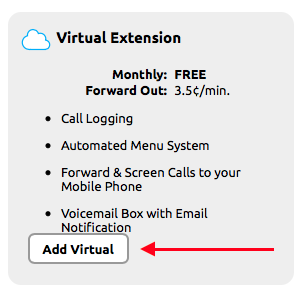
- On the following page locate the Virtual Extension area and click “Add Virtual” to be taken to a new extension page where its details can be edited.
- Click on the pencil icon next to Untitled Extension at the top of the page to give the extension a number and a name.
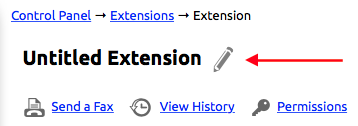
- Click Save at the end of the text box to save the new number and name.

- Click the “Edit” link inside the Inbound Behavior widget.

If you do not see the widget click the gear icon in the upper-right corner of the page.
- In the inbound behavior set Step #1 to Conference Bridge using the drop-down list.
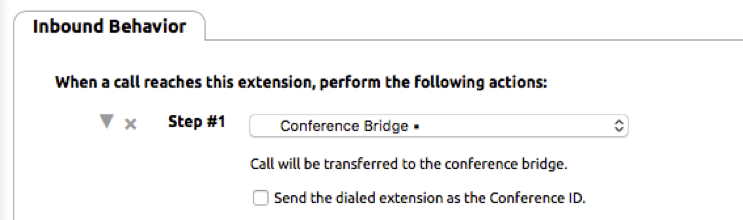
- Leave the "Send the dialed extension as the Conference ID" box uncheck if you are not using a routing table. The user will be connected to the conference center and will then need to enter the Conference ID.
The “Send the dialed extension as the Conference ID” should be checked if the account is using a routing table to direct dialed conference ID to the controlling extension. This allows the user to dial the Conference ID number as an extension and have the controlling extension use this info to fill in the Conference ID automatically allowing the user to bypass the conference center greeting and connecting to the dialed bridge directly.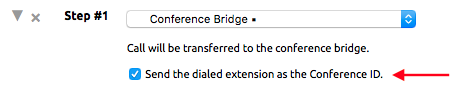
- Delete Step #2 by clicking the gray X to the left of the step.

Then click OK in the popup box.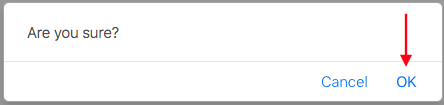
Step #3 will now become a blank Step #2 and can be left as is.
- Click the Submit button at the bottom of the page.

...
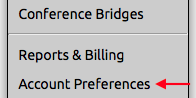
- Login to the NocTel control panel and click Account Preferences in the left-hand menu to expand the section.
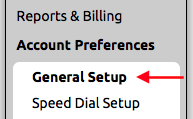
- Select General Setup form the expanded section.
- Click the Routing tab.

- The Routing tab will display any special extension ranges that have been made in the account previously. To create a new one press + .

- In the newly expanded input section, for the From, and To text boxes enter the range that will be used for bridges. For this example, we are using 3001 to 3099 as the range.
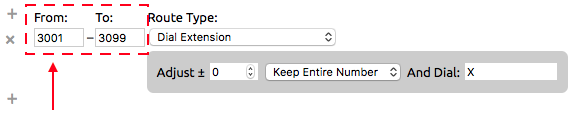
- By default, the Route Type is set to Dial Extension, leave this as is for the conference bridge routing.
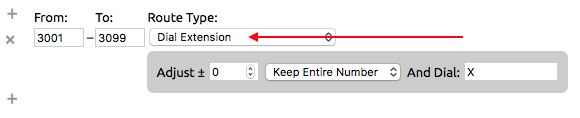
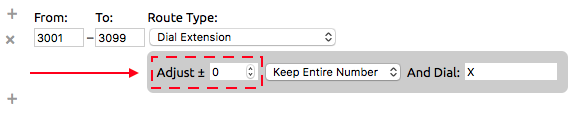
- Leave Adjust +/- to 0 its default setting.
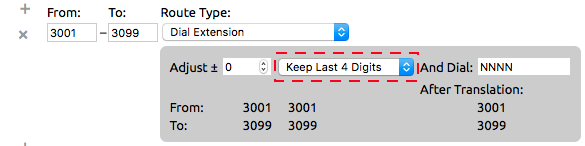
- Set the Keep Entire Number drop-down box to Keep Last 4 Digits.
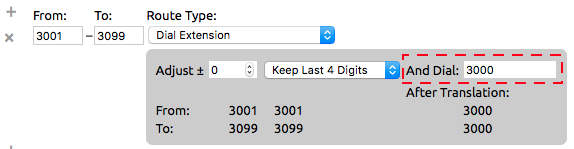
- Set And Dial to the extension number of the controlling extension. In this example that is 3000.
- Click Submit.

...
- Login to the NocTel control panel and click Numbers in the left-hand menu.
- Locate the number in the list that will be used to connect to the conference center from outside of the account, and click on it to open its options page.
- In the Number tab use the drop-down list next to Route to Extension to direct the number to the controlling extension for the conference bridges.
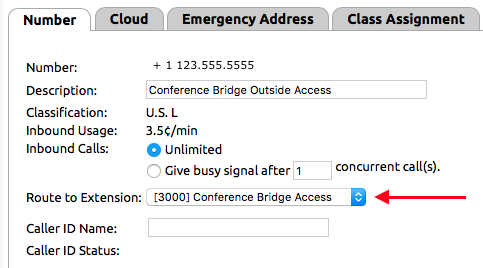
- Click Submit to save the changes.

...