A caller ID name is a 15-character description that is associated with a telephone number. When an outbound call is placed from a number, the number and its associated caller ID name are displayed for the answering party. Once the caller ID name is set to a number, the telephone number can be associated with an extension for its outbound caller ID.
To View the Current Caller ID for a Number
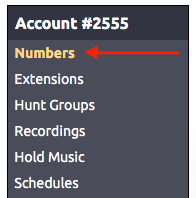
- Log into the NocTel control panel.
- Click on Numbers in the left-hand menu.
- Locate the number in the list or search for it using the pages provided search box, click on the number to open the Edit Number page
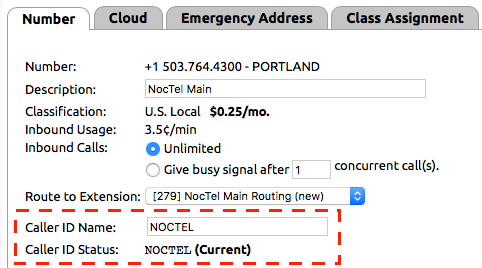
- The Edit Number page opens on the Number tab.
- The Caller ID Status, located towards the bottom of the page shows the number’s current configured Caller ID name and its status.
To Change a Number’s Caller ID Name
Changes can be made to a number’s Caller ID Name using the NocTel control panel. Caller ID Names must adhere to FCC regulations and CNAM database policies and be no longer than 15 characters in length including spaces. Changes to a number’s Caller ID name can take up to 60 days to be updated in the CNAM database and distributed to all carriers on the telephone network.
- On the Number tab, in the Edit Number page, enter the new caller ID name in the text box provided for Caller ID Name.
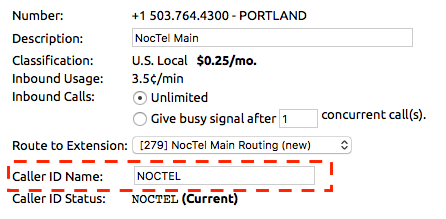
- Click the Submit button to save the changes.
Associating a Caller ID to an Extension.
For an extension to make outbound calls, a valid caller ID number must be associated with it. By default, each NocTel extension is assigned the caller ID of private; this is a default setting for an account that has no numbers added to it. An extension cannot make outbound calls with its caller ID set to private. Caller ID for extensions can be set by the account default, individually, or as a bulk operation.
Setting the Account Default Outbound Caller ID:
- Log into the NocTel control panel.
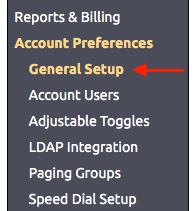
- Click Account Preferences in the left-hand menu to expand the section
- Click General Setup
- On the General Setup page click the Phone System tab.

- In the Location Settings use the dropdown list for Default Outbound caller ID to select a number that should be used for caller ID if another number is not selected for the extension.

- Click the Submit button to save the change.
Assigning a Caller ID to an Individual Extension
- Log into the NocTel control panel.
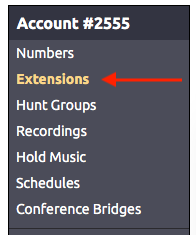
- Click on Extensions in the left-hand menu.
- Locate the extension in the list or search for it using the provided search box. Click on the extension to open its options page.
- Locate the widget for Caller ID, if the caller ID widget is not visible click the gear icon in the top right of the page to unhide the management options.
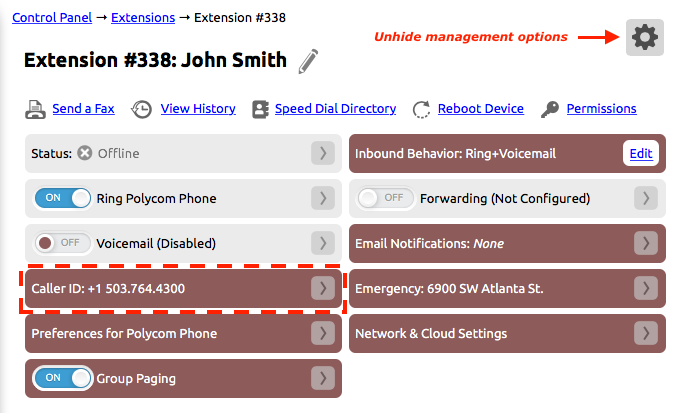
- Click > in the widget to expand it.

- From the list of numbers select the one that should be used for the extension’s outbound caller ID. Please note that if an extension has a DID that connects directly to it, this number does not have the be the number’s outbound caller Id number. The organization's primary number could be used instead.
- Click outside the widget to save the change and close the widget.
Assigning Caller IDs to Multiple Extensions Using the Bulk Operation Tool
Before using the bulk edit tool review the help article covering Bulk Operations Extensions to ensure understanding. Within the Bulk Operation Extensions article is a section covering making changes to Caller ID. If you are uncertain about using the bulk operation tool, please contact NocTel support at support@noctel.com or 503.764.4300 for help.
Related articles